Social Stream Guide
FAQ

So, you want social media integrated onto your website? We'll need API access tokens to dynamically pull that data. Below is the guide on how to do it.
 Contents
This document is presented to serve as a guide for clients wishing to integrate Instagram, YouTube, Twitter, and Facebook to their website. Instructions in this guide were collated from Facebook for Developer’s documentation for Instagram Basic Display API, Pages API, Twitter Help Center, Google’s YouTube Data API, and YouTube Help Center. Please refer to the sources cited at the end of the document for more information.
Please take note of the following:
For security purposes, please keep these credentials confidential. You should only share them with third-party services that you trust. Please also bear in mind that you must be an admin of the Facebook page that you are trying to integrate.
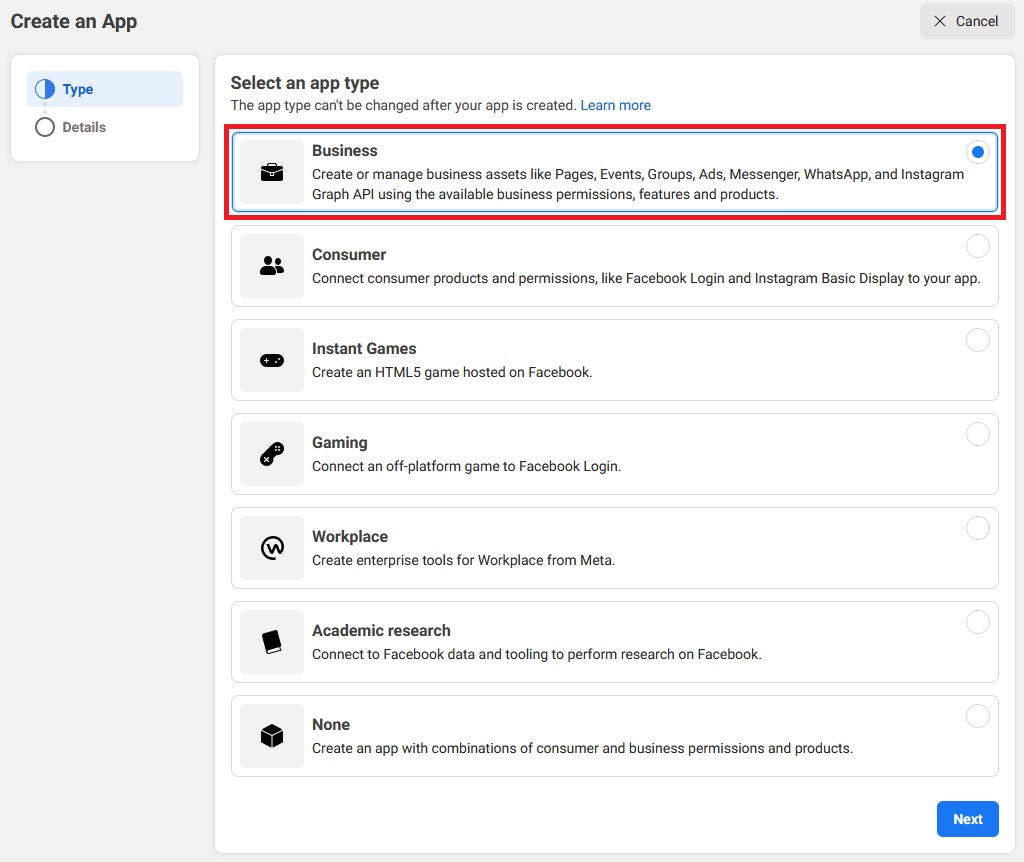
Go to Facebook for Developers site (https://developers.facebook.com) and login using your Facebook account. Go to My Apps tab and select Create App. Choose the Business option when asked regarding the app type then click Next.
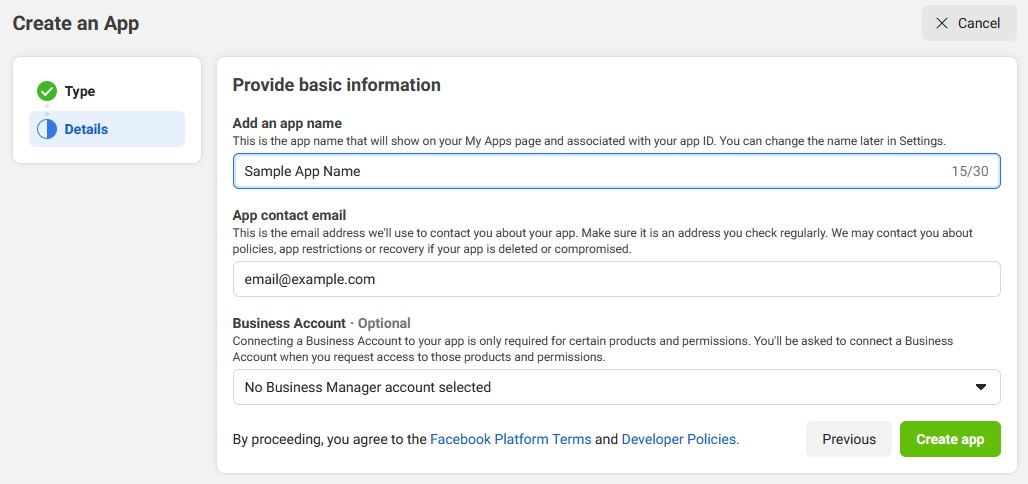
Enter the necessary information such as App Name and App Contact Email. Click Create App. You may be prompted to enter the password of your account to proceed with the app creation.
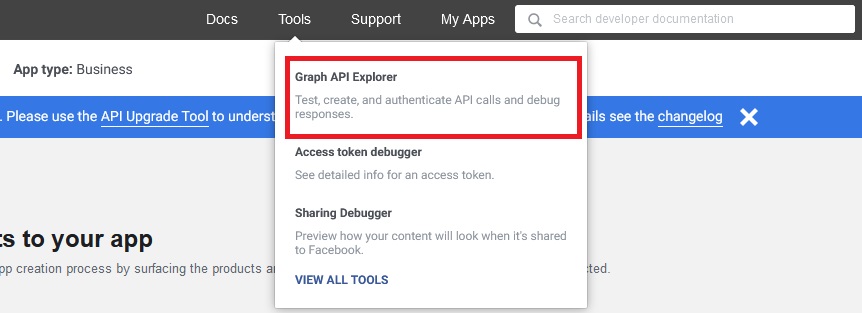
Hover over the Tools tab and select Graph API Explorer.
Choose the app created previously in the Meta App field and select the Get Page Access Token in the User or Page dropdown.

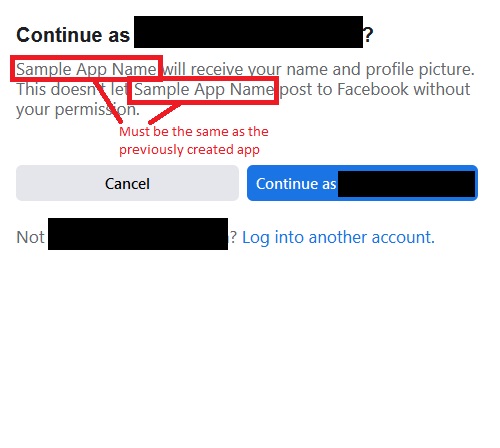
Continue using your account (admin of the page) and verify that you have selected the right app.
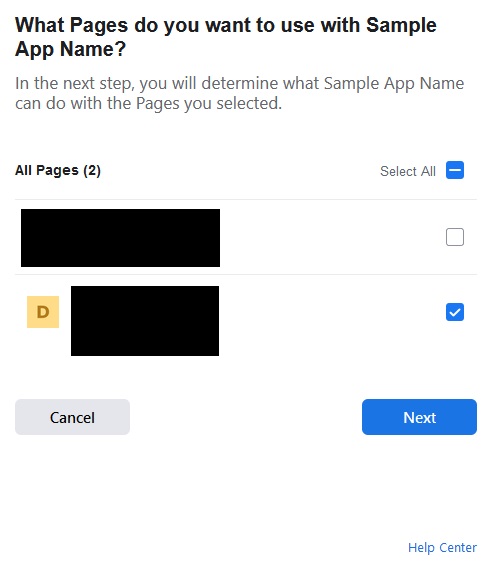
Select the page that you want to access then hit Next.
Make sure to allow both permissions then click Done.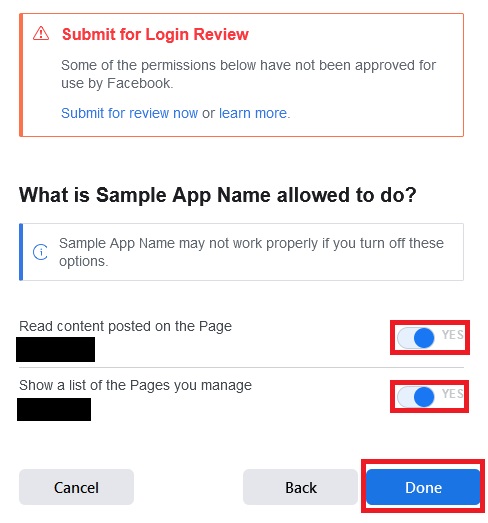
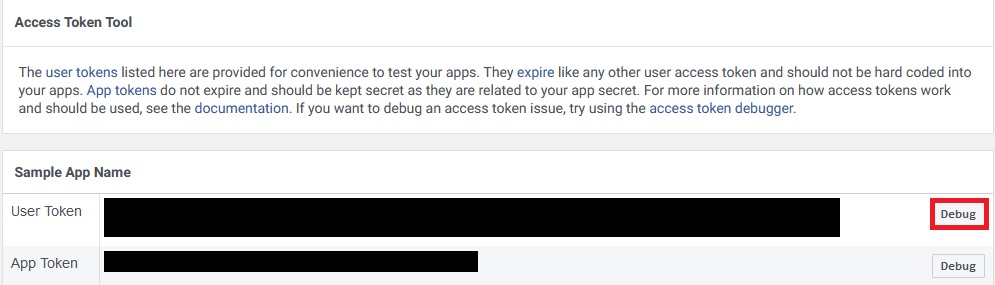
Go to (https://developers.facebook.com/tools/accesstoken). There you will find short lived user access tokens and app access token of all the apps you have. Click Debug option for the User Token of the previously created app.
Copy the access token in the text area. Go to Tools under More tab then select Graph API Explorer.

Paste the access token in the Access Token field. Type me/accounts/ in the request form then click Submit.
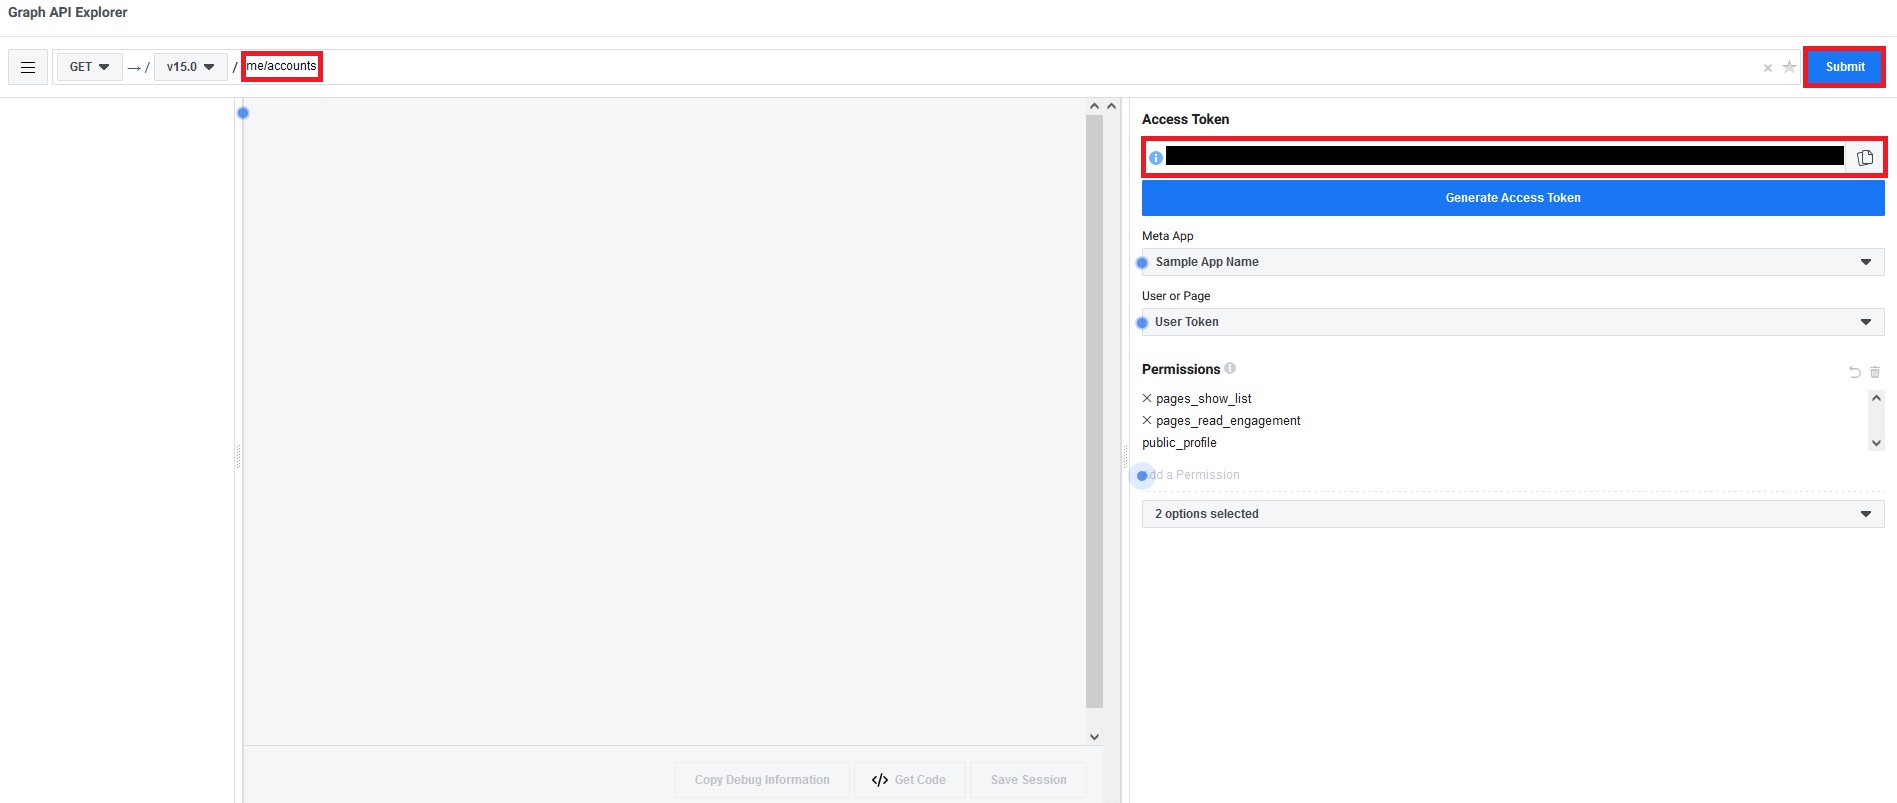
This will return the page access tokens and pages related to them. Find the access token for the desired page. This will be your page access token access token. Copy this.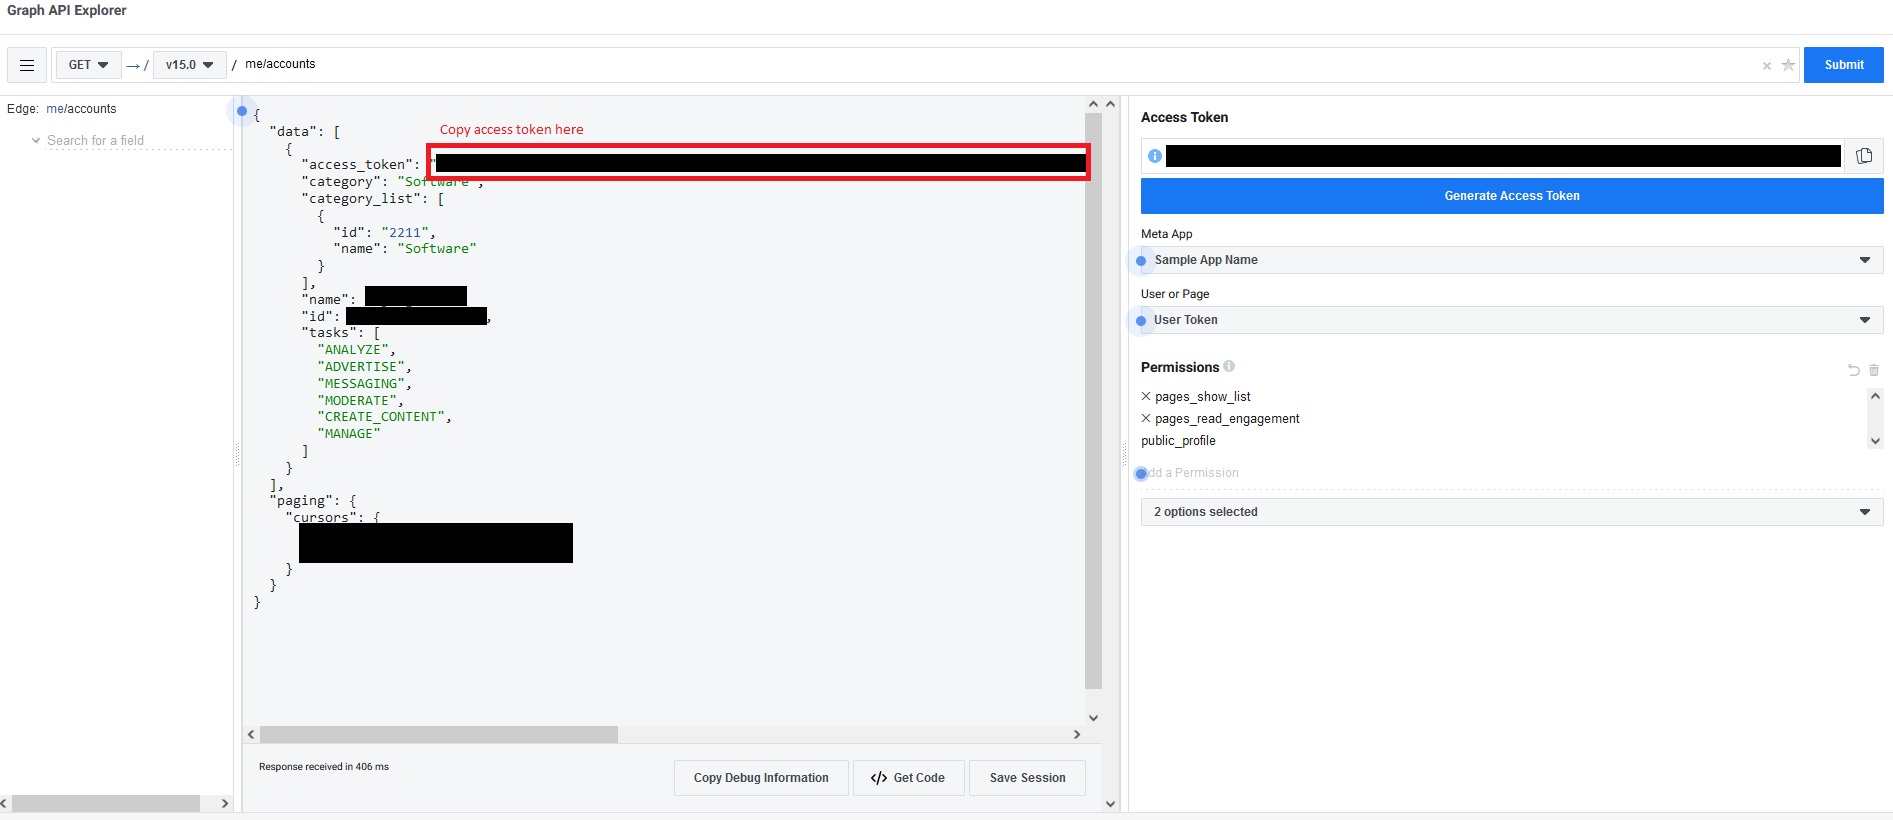
You may now stop here. Provide us with the access token. The verification and integration will be done by our programmers.
Please send the credentials to a member of our team through a personal message or email.
Hover over Tools tab then click Access Token Debugger. Paste your access token on the text area then proceed to Debug.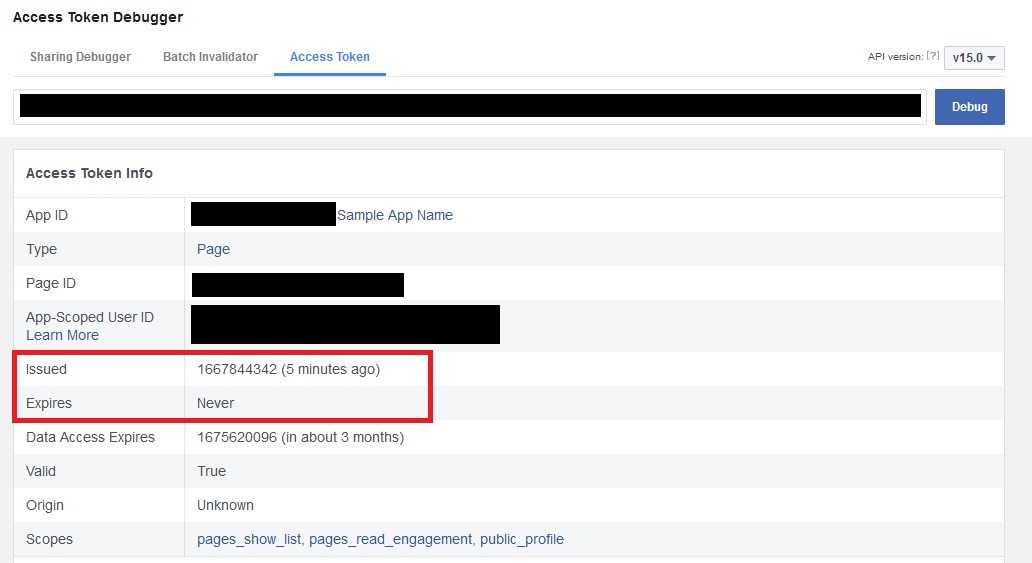
Check the Expires value on the returned data. Verify if its value is Never. Take note of your access token.
Please take note of the following:
For security purposes, please keep these credentials confidential. You should only share them with third-party services that you trust.
Go to Facebook for Developers site (https://developers.facebook.com) and login using your Facebook account. Go to My Apps tab and select Create App. Choose the Consumer option when asked regarding the app type then click Next.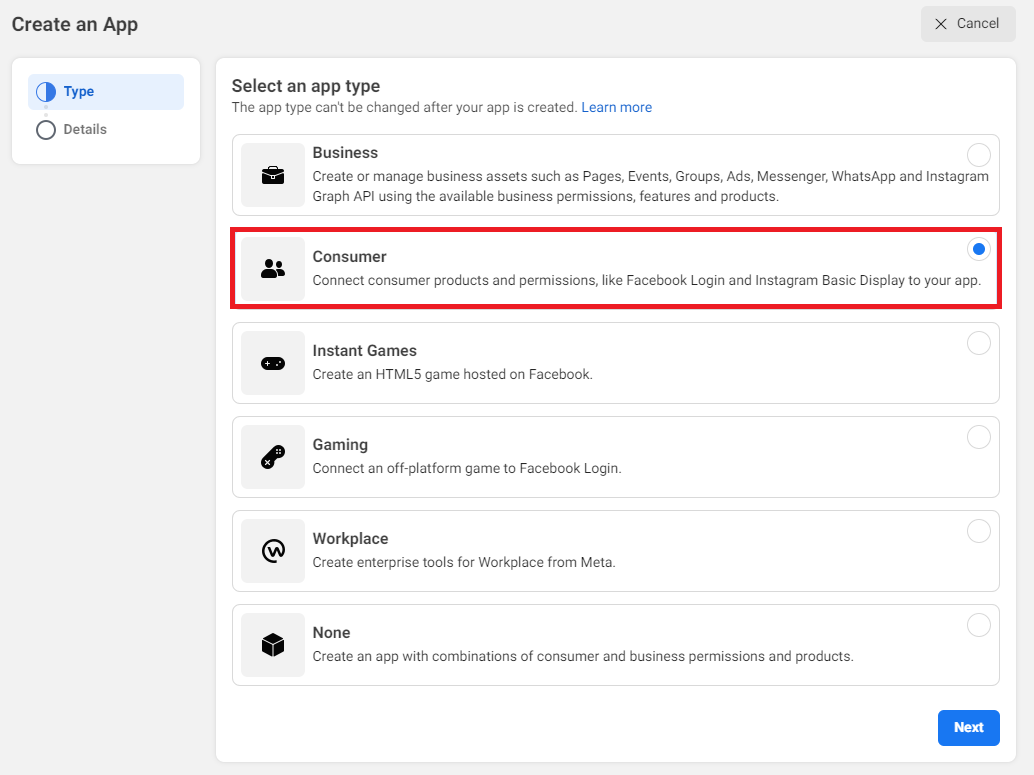
Supply other necessary information like Display Name and App Contact Email then click Create App. You might be asked to re-enter your Facebook password to continue.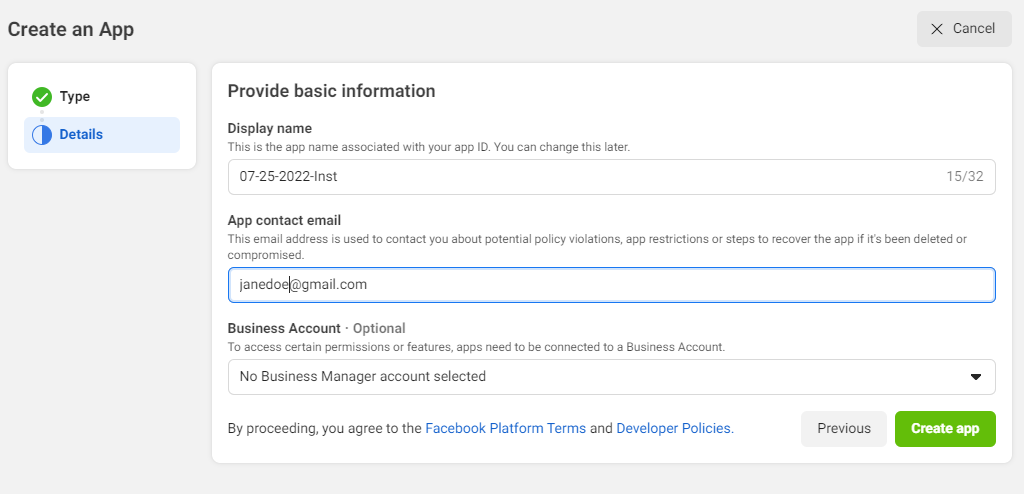
Once you have created the app, navigate to Settings > Basic. Scroll to the bottom of the page and click Add Platform.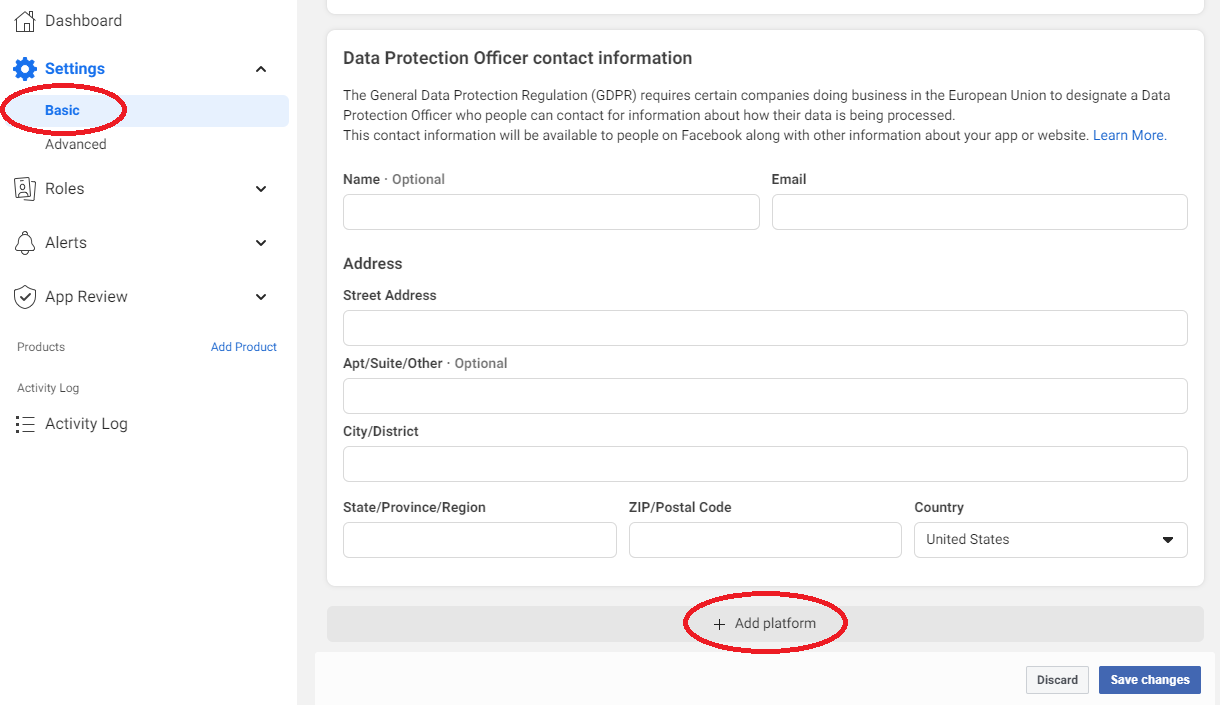
Choose Website then add your website’s home page URL. Click Save Changes afterwards. Use the same URL if asked to fill out the Privacy Policy URL and User Data deletion URL.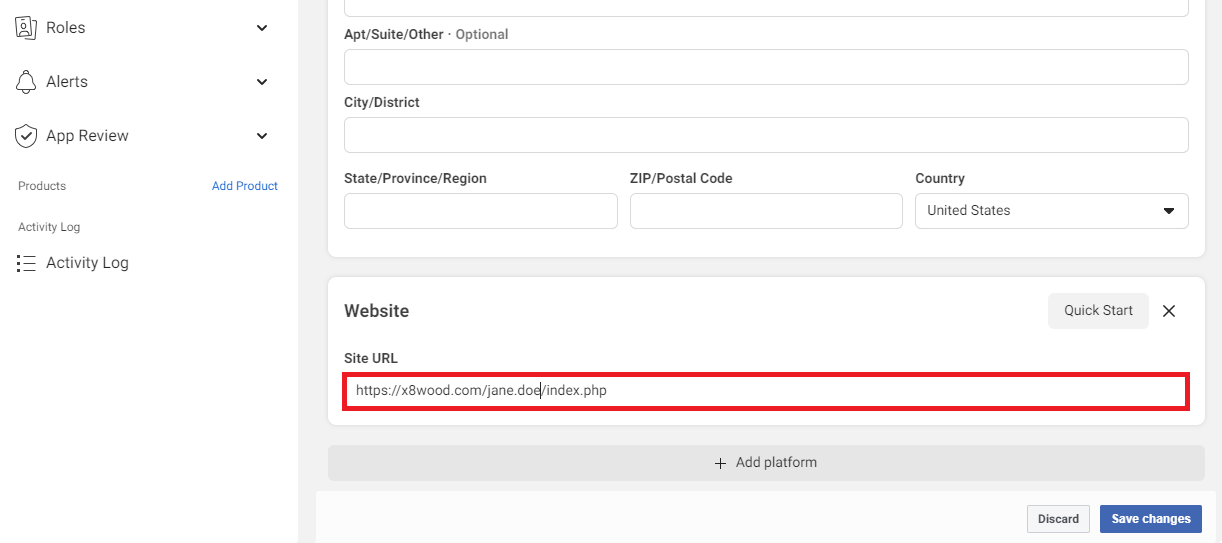
Go to Products > Add Product, find Instagram Basic Display, and click the Set Up button.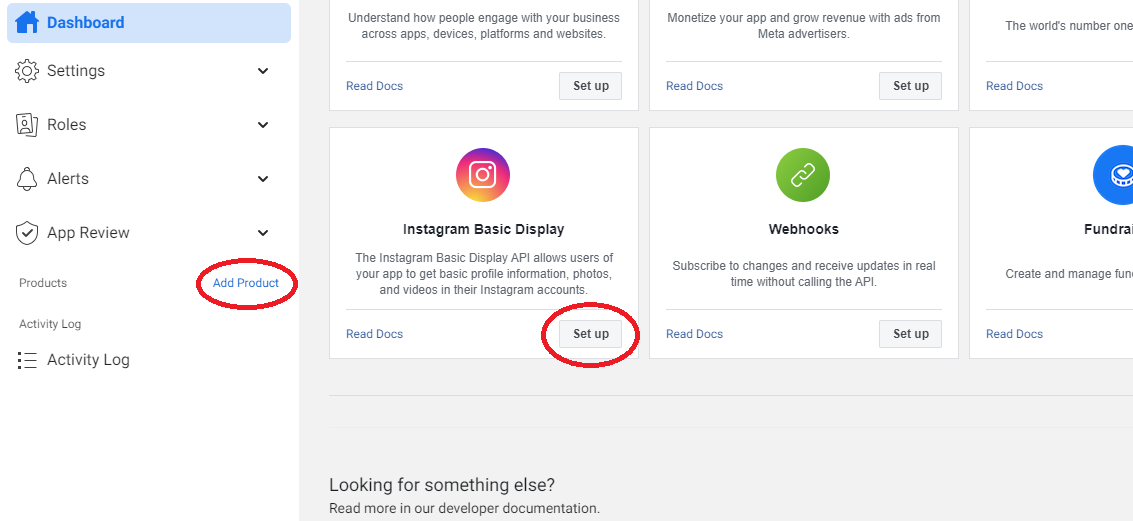
Go to Basic Display, and click the Create New App button on the bottom of the page.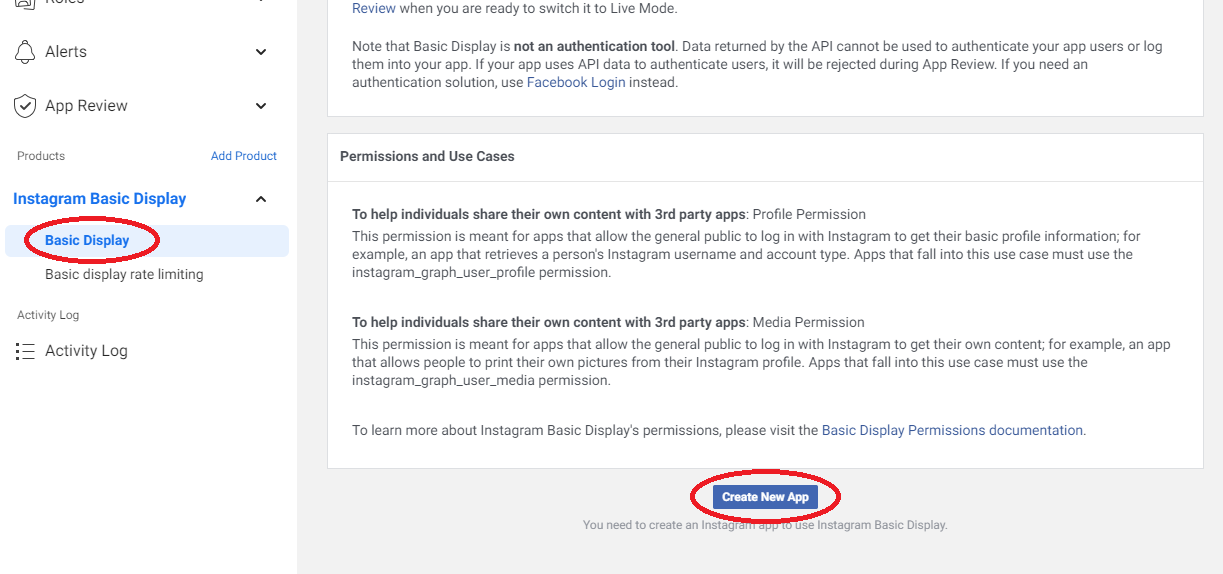
Enter the name of the Facebook app you just created. Then click Create App.
Enter your website’s home page URL on the Valid OAuth Redirect URIs, Deauthorize Callback URL, and Data Deletion Request URL fields. Make sure to follow the format shown below. Click Save Changes afterwards.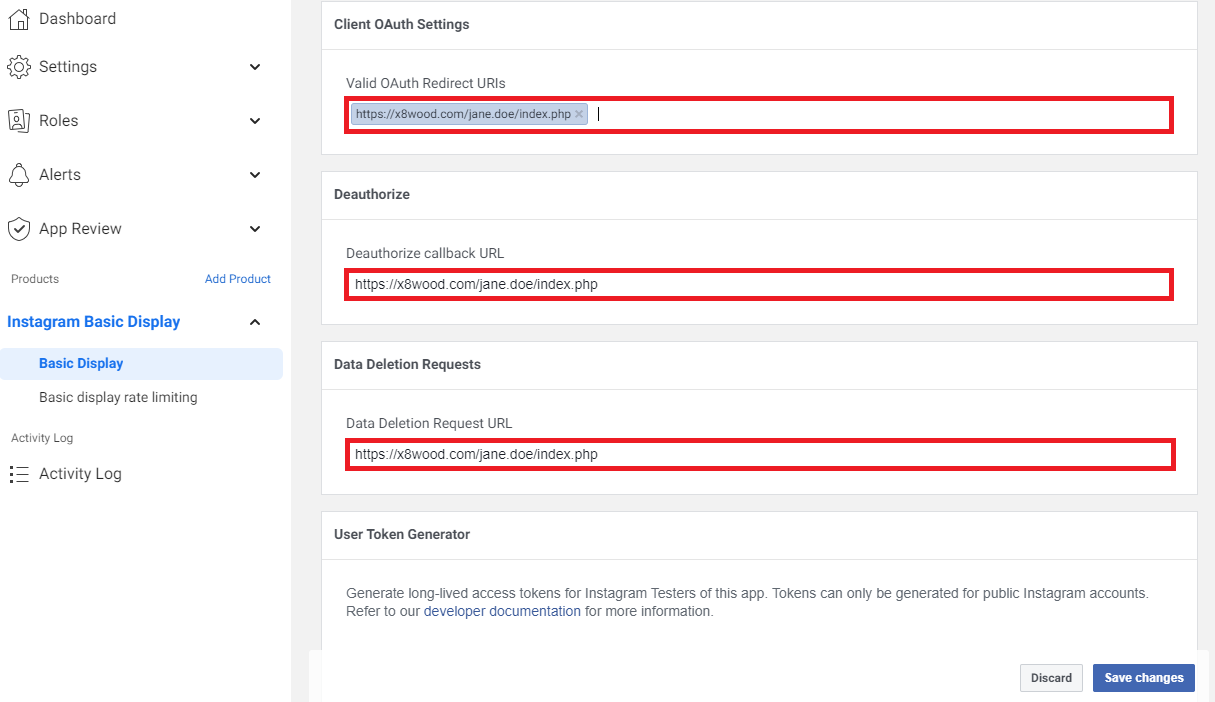
Navigate to Roles>Roles and find the Instagram Tester section on the bottom. Click Add Instagram Testers and enter your Instagram account’s username to send an invitation.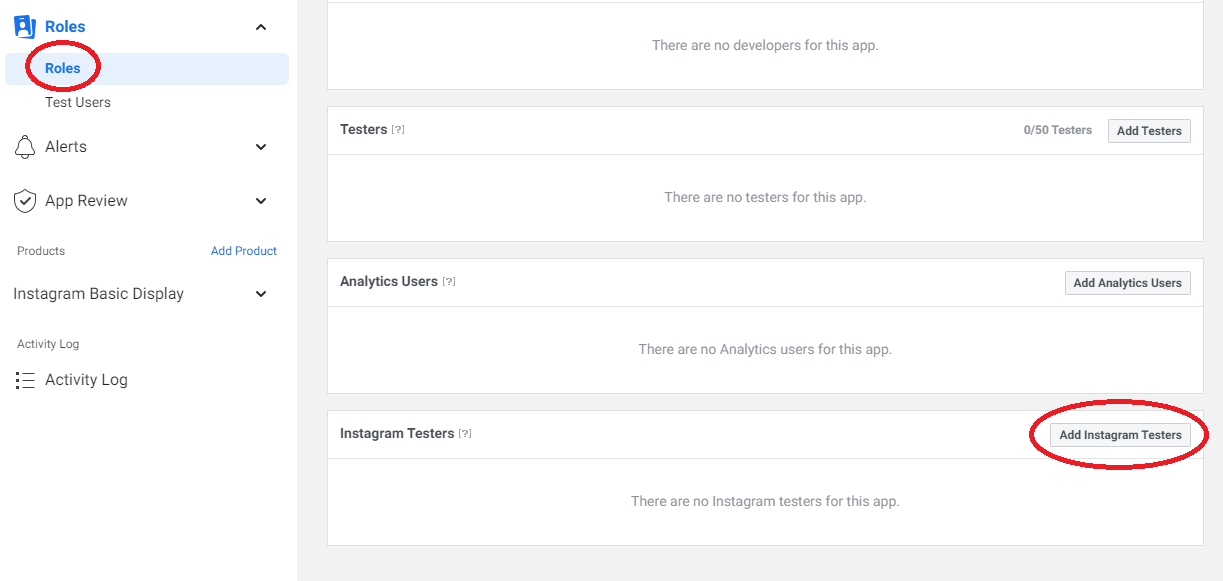
Sign in to your Instagram account on a new tab. Go to your profile and navigate to Edit Profile>Apps and Websites>Tester Invites and accept the invitation.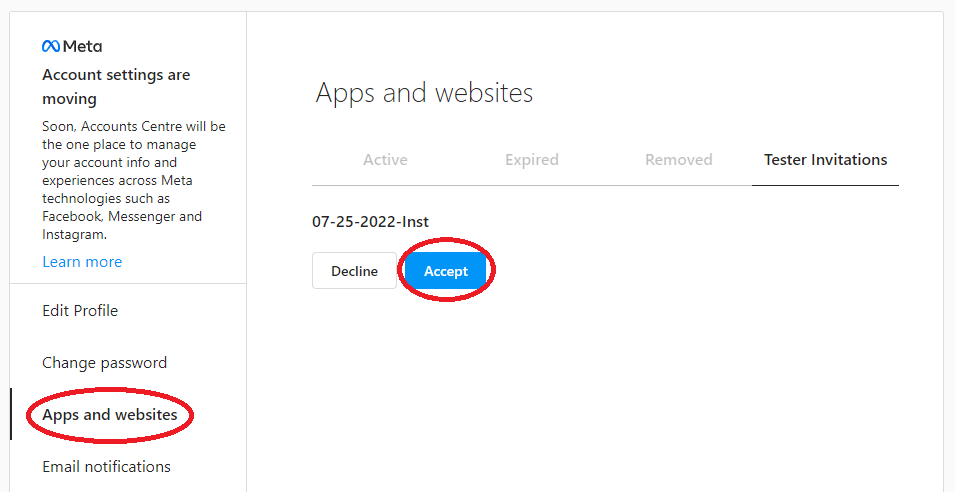
Go to Instagram Basic Display Basic Display. Find the User Token Generator section, and select Generate for the connected Instagram account you wish to integrate to the website.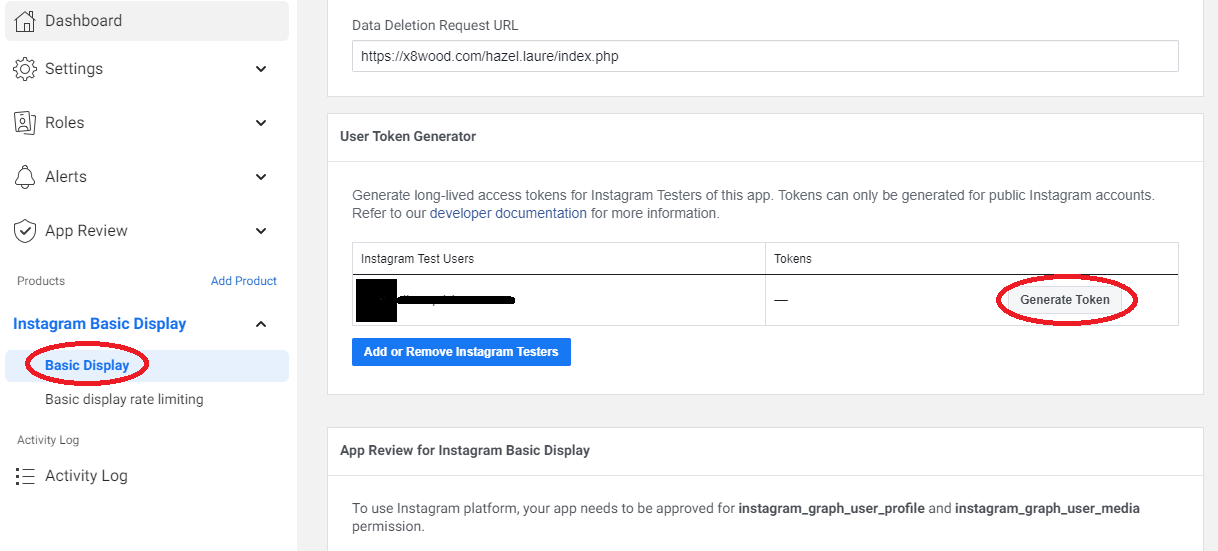
Clicking this will prompt a login page, and then redirect to a page asking to allow access to that Instagram account's Profile Information and Media. Please make sure to click Allow.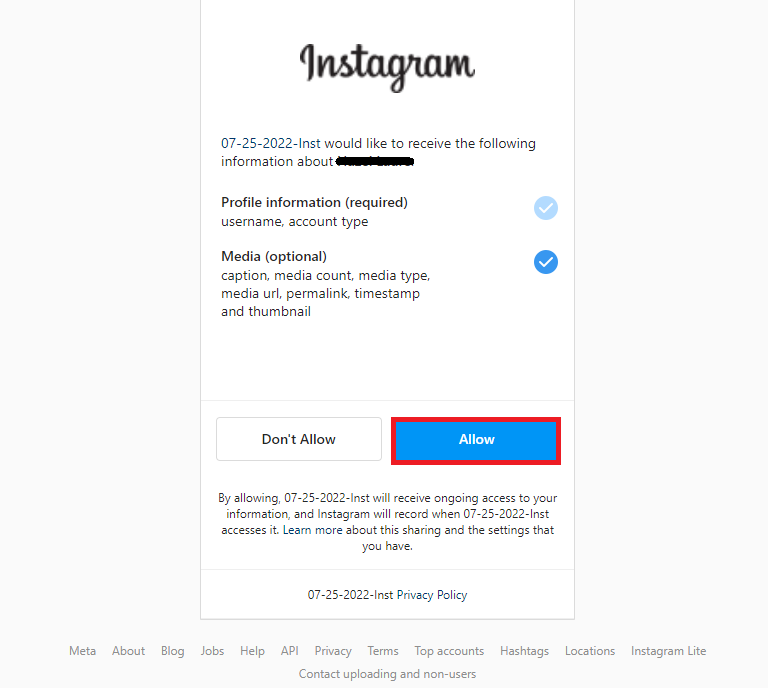
You will then be redirected back to Meta for Developers with the generated token. Click I Understand then copy this token and send it over to us.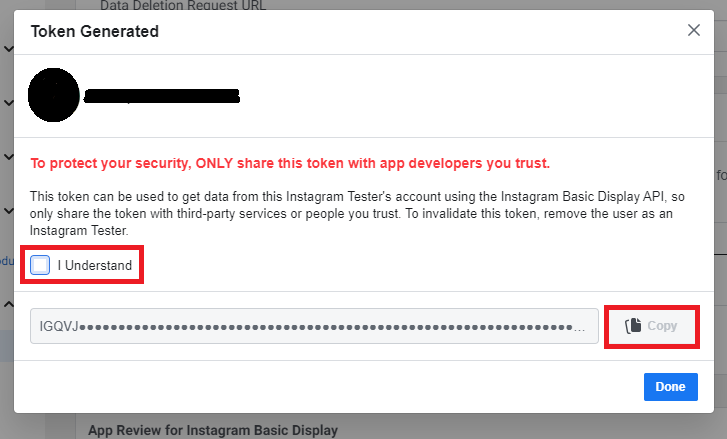
You may now stop here. Provide us with the long-lived access token and the succeeding steps will be done by our programmers.
Please send the credentials to a member of our team through a personal message or email.
Long-lived tokens will expire after 60 days when not refreshed so make sure to do so to extend its validity for another 60 days.
curl -i -X GET
"https://graph.instagram.com/refresh_access_token?grant_type=ig_refresh_token&access_token={long-lived-access-token}"
Sample response
{
	"access_token":"{long-lived-user-access-token}",
	"token_type": "bearer",
	expires_in": 5183944 // Number of seconds until token expires
}Perform the query below to fetch a collection of media from the Instagram user.
curl -i -X GET
'https://graph.instagram.com/me/media?fields=id,caption,media_url,permalink,thumbnail_url&access_token=IGQVJ...'
Please take note of the following:
For security purposes, please keep these credentials confidential. You should only share them with third-party services that you trust.
You need a Google Account to access the Google API Console, request an API key, and register your application.
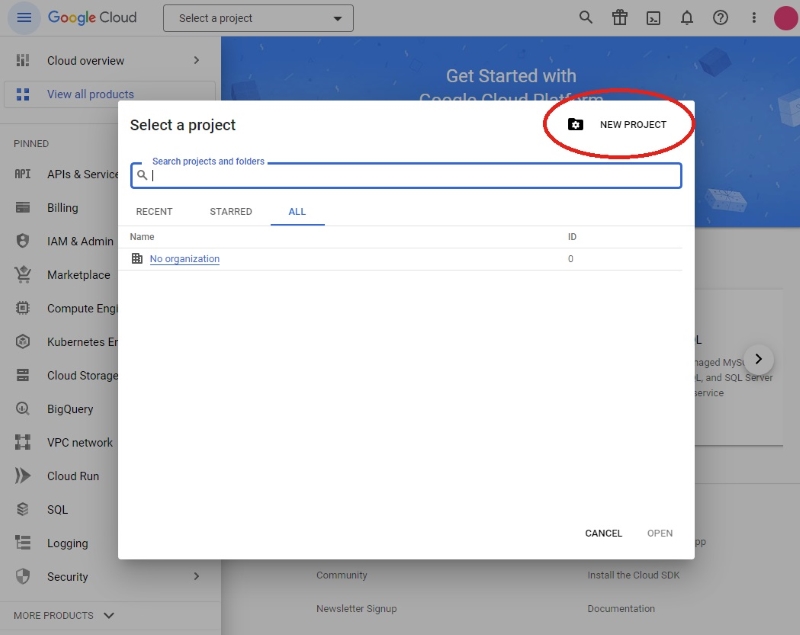
Create a project in the Google Developers Console. Select Select a project at the top of the screen, then select NEW PROJECT in the popup that follows.
(https://console.developers.google.com/)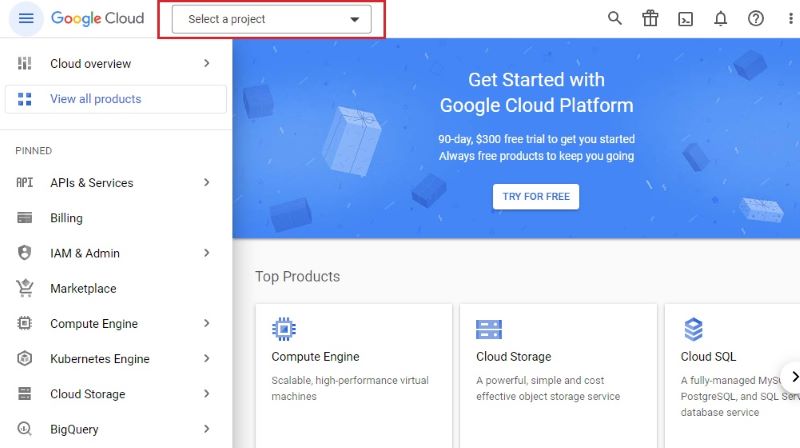
Enter desired Project Name then proceed by clicking Create.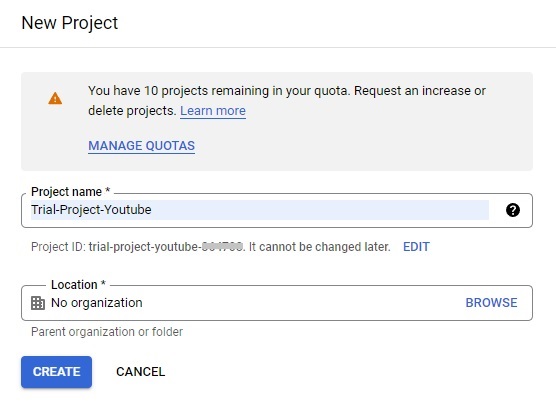
Select SELECT PROJECT on the newly-created project in your notifications.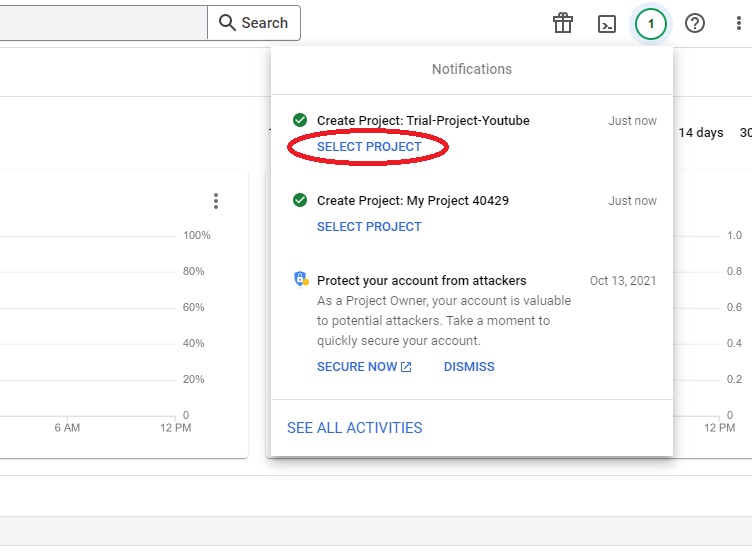
Go to the APIs & Services > Credentials tab.
Click the Create Credentials option on top then select the API key to generate the key. Click Close on the pop-up window.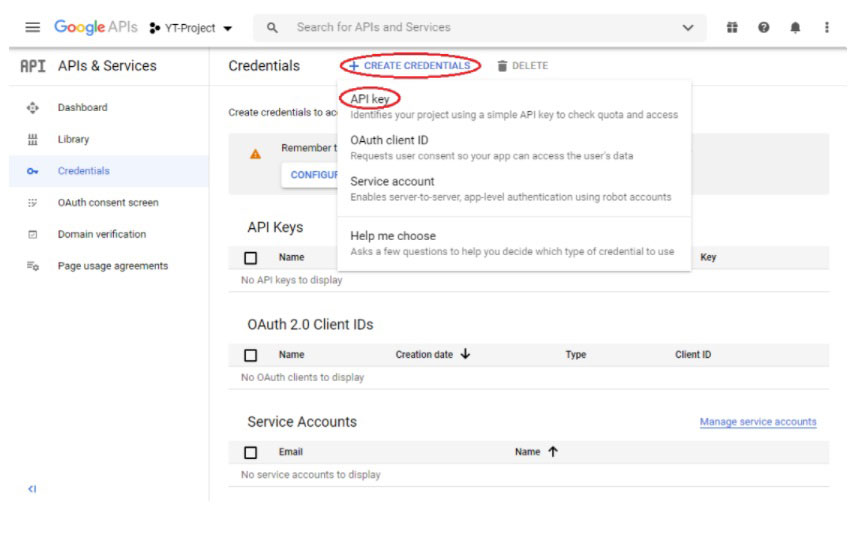
After creating your project, make sure the YouTube Data API is one of the services that your application is registered to use.
Go to your project’s Enabled APIs & services and click Enable APIs and Services option on the upper part of the screen.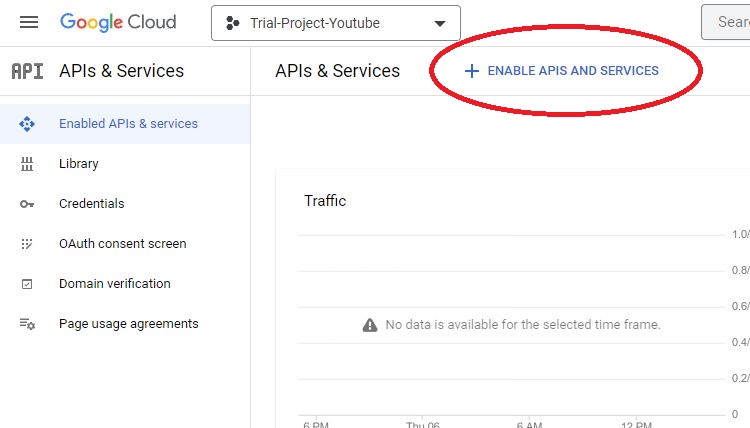
Search for YouTube Data API v3. Select the search result then click Enable.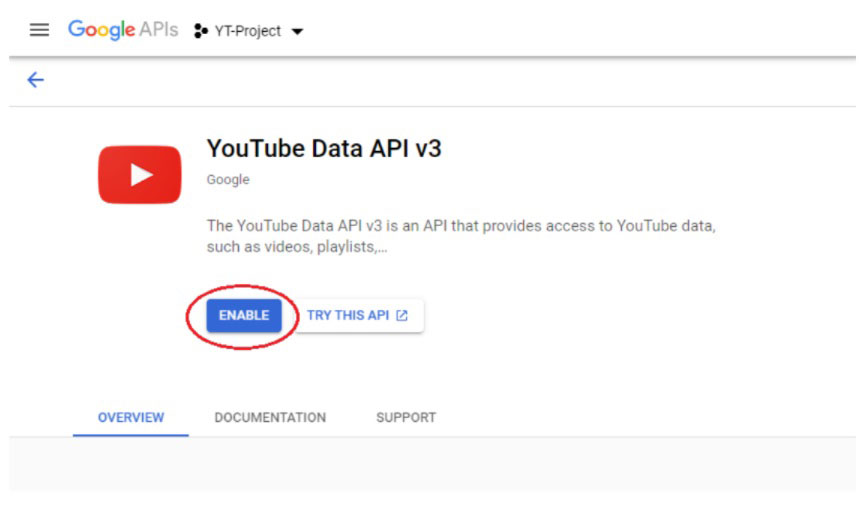
Go back to the Credentials page
(https://console.developers.google.com/apis/credentials).
Click the name of the API Key that was previously generated.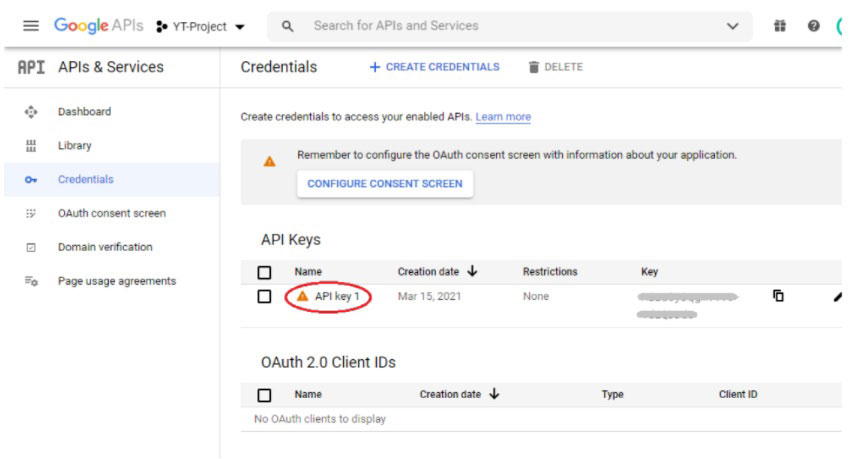
Under the API Restrictions section, choose the Restrict Key option and select YouTube Data API v3 on the dropdown. Save changes afterwards.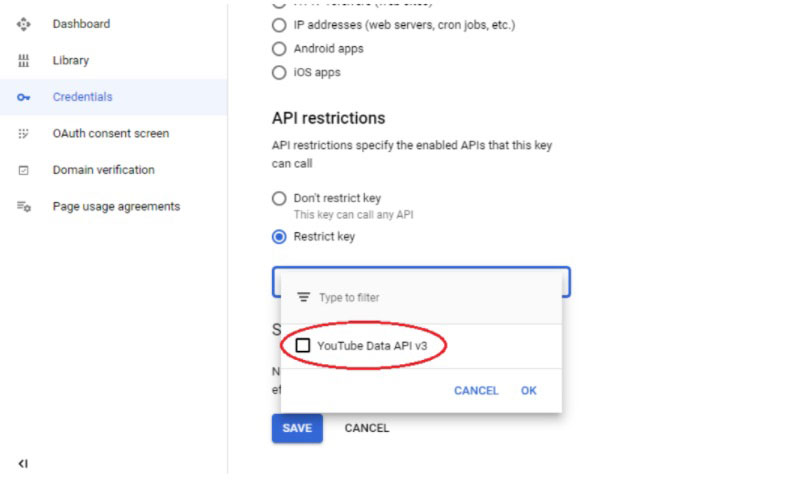
Click on the icon beside the Key column to copy your API key. Paste it in a text file then proceed to the next steps.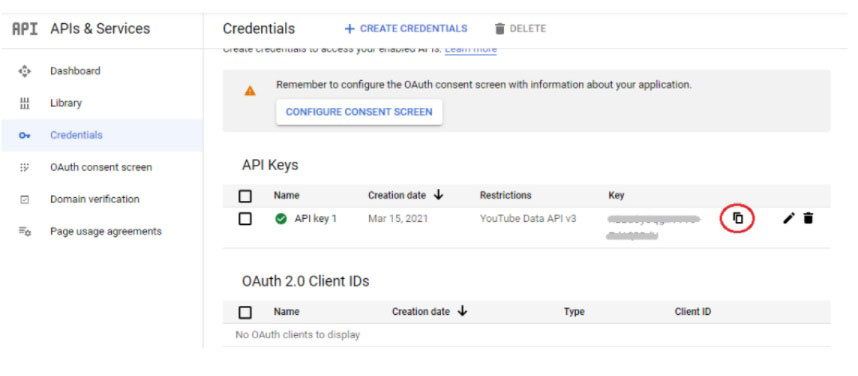
Sign in to YouTube. In the top right, click your profile picture > Settings.
From the left menu, select <Advanced Settings. Take note of your Channel ID..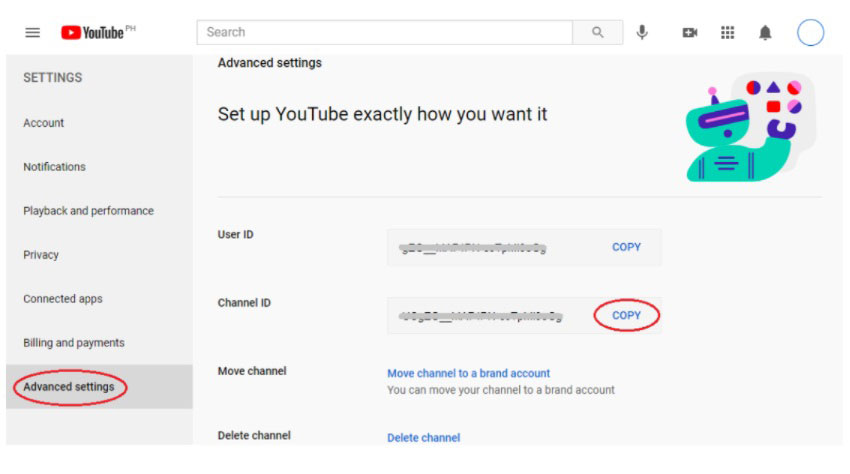
You may now stop here. Provide us with the API Key and Channel ID. The succeeding steps will be done by our programmers.
Please send the credentials to a member of our team through a personal message or email.
Perform the query below to fetch a collection of media from the YouTube channel.
curl -i -X GET \
'https://www.googleapis.com/youtube/v3/search?part=snippet,id&order=date&channelId={channel-id}&maxResults={limit}&key={api-key}'
Please take note of the following:
Embedded timelines will only show content from accounts that have public tweets. Content from accounts with protected Tweets are not compatible with any Twitter embedded timeline widgets.
Go to https://publish.twitter.com/
Enter the URL of the timeline or Moment that you would like to embed. Click the arrow on the right to proceed.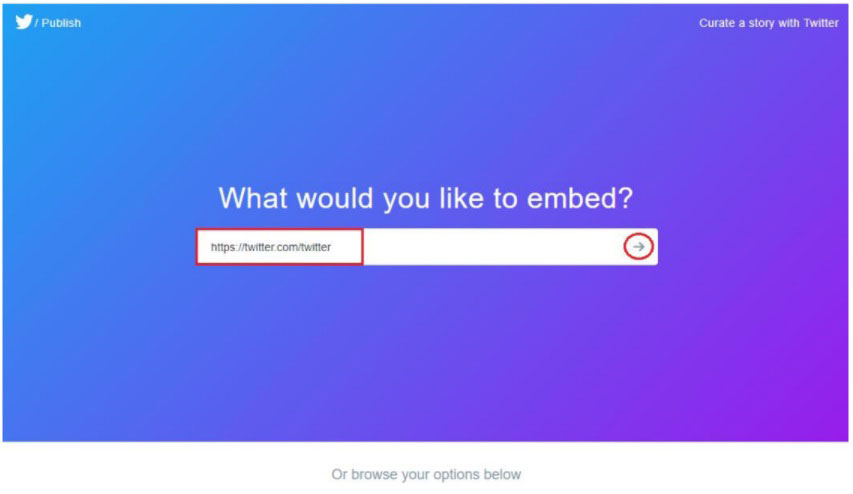
Select from the display options presented.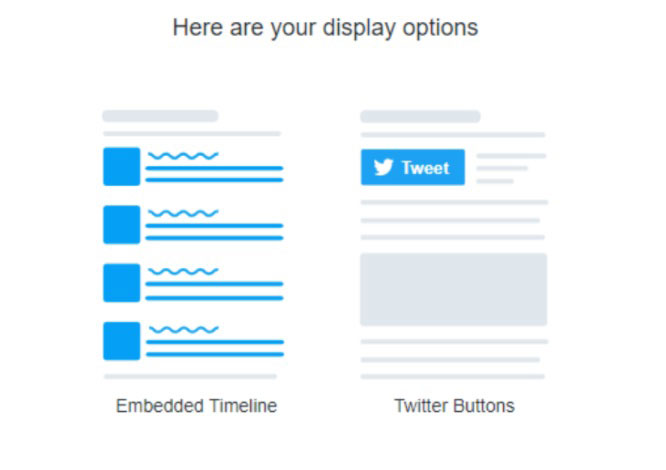
Check the preview presented below. Click on Copy Code once you’re satisfied of how it looks.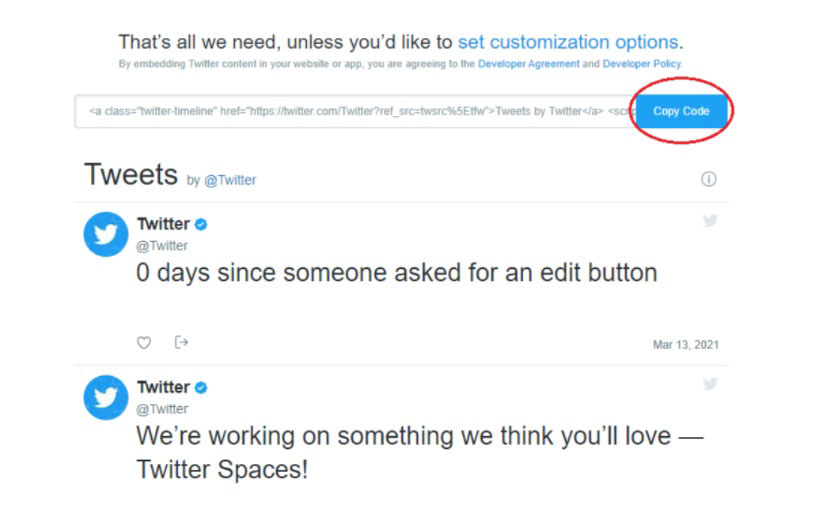
You may now stop here and provide us with the code from the last step. The verification and integration will be done by our programmers.
Please send the credentials to a member of our team through a personal message or email.
[1]"Overview - Instagram Platform - Documentation - Facebook for Developers", Facebook for Developers, 2020. [Online].
Available: https://developers.facebook.com/docs/instagram-basic-display-api/overview [Accessed: 13- May- 2020].
[2]"Get Started - Instagram Platform - Documentation - Facebook for Developers", Facebook for Developers, 2020. [Online].
Available: https://developers.facebook.com/docs/instagram-basic-display-api [Accessed: 13- May- 2020].
[3]"Long-Lived Tokens - Instagram Platform - Documentation - Facebook for Developers", Facebook for Developers, 2020. [Online].
Available: https://developers.facebook.com/docs/instagram-basic-display-api/guides/long-lived-access-tokens [Accessed: 13- May- 2020].
[4]"Get Profiles and Media - Instagram Platform - Documentation - Facebook for Developers", Facebook for Developers, 2020. [Online].
Available: https://developers.facebook.com/docs/instagram-basic-display-api/guides/getting-profiles-and-media [Accessed: 13- May- 2020].
[5] "Find your YouTube user & channel IDs - YouTube Help", YouTube Help, 2020. [Online].
Available: https://support.google.com/youtube/answer/3250431?hl=en [Accessed: 26- May- 2020].
[6]"YouTube Data API Overview | Google Developers", Google Developers, 2020. [Online].
Available: https://developers.google.com/youtube/v3/getting-started [Accessed: 26- May- 2020].
[7] "How to embed a timeline", Help.twitter.com, 2020. [Online].
Available: https://help.twitter.com/en/using-twitter/embed-twitter-feed. [Accessed: 26- May- 2020].
[8] “Generate Long-Lived User and Page Access Tokens.” Long-Lived Tokens - Facebook Login - Documentation - Facebook for Developers, developers.facebook.com/docs/facebook-login/access-tokens/refreshing/.